Lens flare adds a magical touch to photos, creating bursts of light that make images pop. With Photeeq, a powerful photo editing tool, you can enhance or add lens flare to your pictures for a professional, eye-catching look. This guide explains how to use Photeeq lens flare, why it matters, and how to make your photos stand out. Whether you’re a beginner or a seasoned photographer, you’ll find practical tips to create stunning visuals.
What Is Lens Flare?
Lens flare happens when light scatters inside a camera lens, often caused by a bright source like the sun or artificial lights. It appears as streaks, halos, or starbursts in photos. While some photographers avoid it, others use lens flare to add warmth, drama, or a dreamy vibe to their images. Photeeq makes it easy to add or tweak lens flare in post-production, giving you control over your photo’s mood.
Why Use Lens Flare in Photography?
Lens flare enhances photos by adding depth and emotion. It draws attention to specific areas, creates a cinematic feel, and makes images look dynamic. With Photeeq, you can customize lens flare to match your vision, whether you want subtle glows or bold light bursts. This tool helps photographers of all levels achieve professional results without complex setups.
How to Add Lens Flare Using Photeeq
Photeeq simplifies the process of adding lens flare to your photos. Follow these steps to get started:
1. Import Your Photo
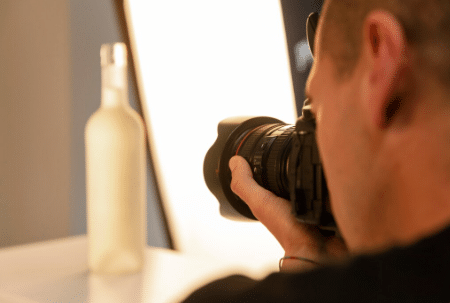
Open Photeeq and upload the image you want to edit. Choose a photo with a bright light source, like the sun or a lamp, for a natural lens flare effect. If your photo lacks a light source, Photeeq can add one artificially.
2. Access the Lens Flare Tool
Navigate to the effects menu in Photeeq. Look for the lens flare option, usually found under “Lighting Effects” or “Filters.” Photeeq offers a variety of lens flare styles, such as starbursts, circular flares, or soft glows.
3. Customize the Flare
Adjust the lens flare settings to fit your photo. You can change the intensity, size, and position of the flare. For a natural look, place the flare near a light source, like the sun in a landscape shot. Photeeq lets you drag the flare to the perfect spot and tweak its brightness for balance.
4. Fine-Tune the Effect
Use Photeeq’s sliders to control the flare’s color, opacity, and spread. For a warm, golden glow, choose yellow or orange tones. For a cooler vibe, try blue or white hues. Experiment with settings to match the photo’s mood, ensuring the flare enhances rather than overwhelms the image.
5. Save and Export
Once you’re happy with the lens flare, save your edited photo. Photeeq supports high-resolution exports, perfect for sharing on social media or printing. Double-check the image to ensure the flare looks natural and complements the composition.
Tips for Using Photeeq Lens Flare Effectively
To make your lens flare stand out, keep these tips in mind:
Choose the Right Photo
Lens flare works best in photos with high contrast or bright light sources. Outdoor shots with sunlight or indoor photos with lamps are ideal. Avoid adding flares to flat or dark images, as they may look unnatural.
Keep It Subtle
Overusing lens flare can distract viewers. Use Photeeq’s opacity settings to keep the effect soft and natural. A subtle flare adds charm without overpowering the subject.
Match the Light Source
Align the flare with the photo’s existing light source for realism. For example, if the sun is in the top-left corner, place the flare nearby. Photeeq’s drag-and-drop feature makes this easy.
Experiment with Styles
Photeeq offers multiple lens flare styles, from classic starbursts to modern glows. Try different options to find the best fit for your photo. For example, a starburst works well in dramatic landscapes, while a soft glow suits portraits.
Combine with Other Effects
Pair lens flare with other Photeeq tools, like color grading or vignette, to enhance your photo. A slight vignette can make the flare pop, while color adjustments can match the flare’s tone to the image.
Common Mistakes to Avoid
When using Photeeq lens flare, steer clear of these pitfalls:
Overloading the Image
Too much flare can make your photo look cluttered. Stick to one or two flares for a clean, professional result.
Ignoring Composition
Place the flare strategically to guide the viewer’s eye. Avoid covering key elements like faces or focal points in the photo.
Using Inconsistent Lighting
Ensure the flare matches the photo’s lighting direction. A flare that doesn’t align with the light source looks artificial and breaks the image’s flow.
Why Photeeq Is Perfect for Lens Flare
Photeeq stands out for its user-friendly interface and powerful editing tools. Unlike other software, it offers precise control over lens flare placement and style. Its intuitive design makes it accessible for beginners, while its advanced features satisfy professional photographers. Plus, Photeeq’s lens flare effects are customizable, ensuring every photo looks unique.
Benefits of Using Photeeq
-
Easy to Use: The drag-and-drop interface simplifies flare placement.
-
Versatile Options: Choose from various flare styles to match your vision.
-
High-Quality Results: Export crisp, professional-grade images.
-
Time-Saving: Add flares quickly without complex workflows.
Conclusion
Photeeq lens flare transforms your photos by adding a touch of magic and professionalism. With its easy-to-use tools, you can create stunning light effects that enhance your images’ mood and appeal. By following the steps and tips in this guide, you’ll master lens flare and avoid common mistakes. Whether you’re editing landscapes, portraits, or creative shots, Photeeq makes it simple to achieve a polished look. Start experimenting with lens flare today to elevate your photography game.